
_600px.png)

Directional beam angle
Suitable for sports pitches
Low-glare and building regulation compliant
find out more...
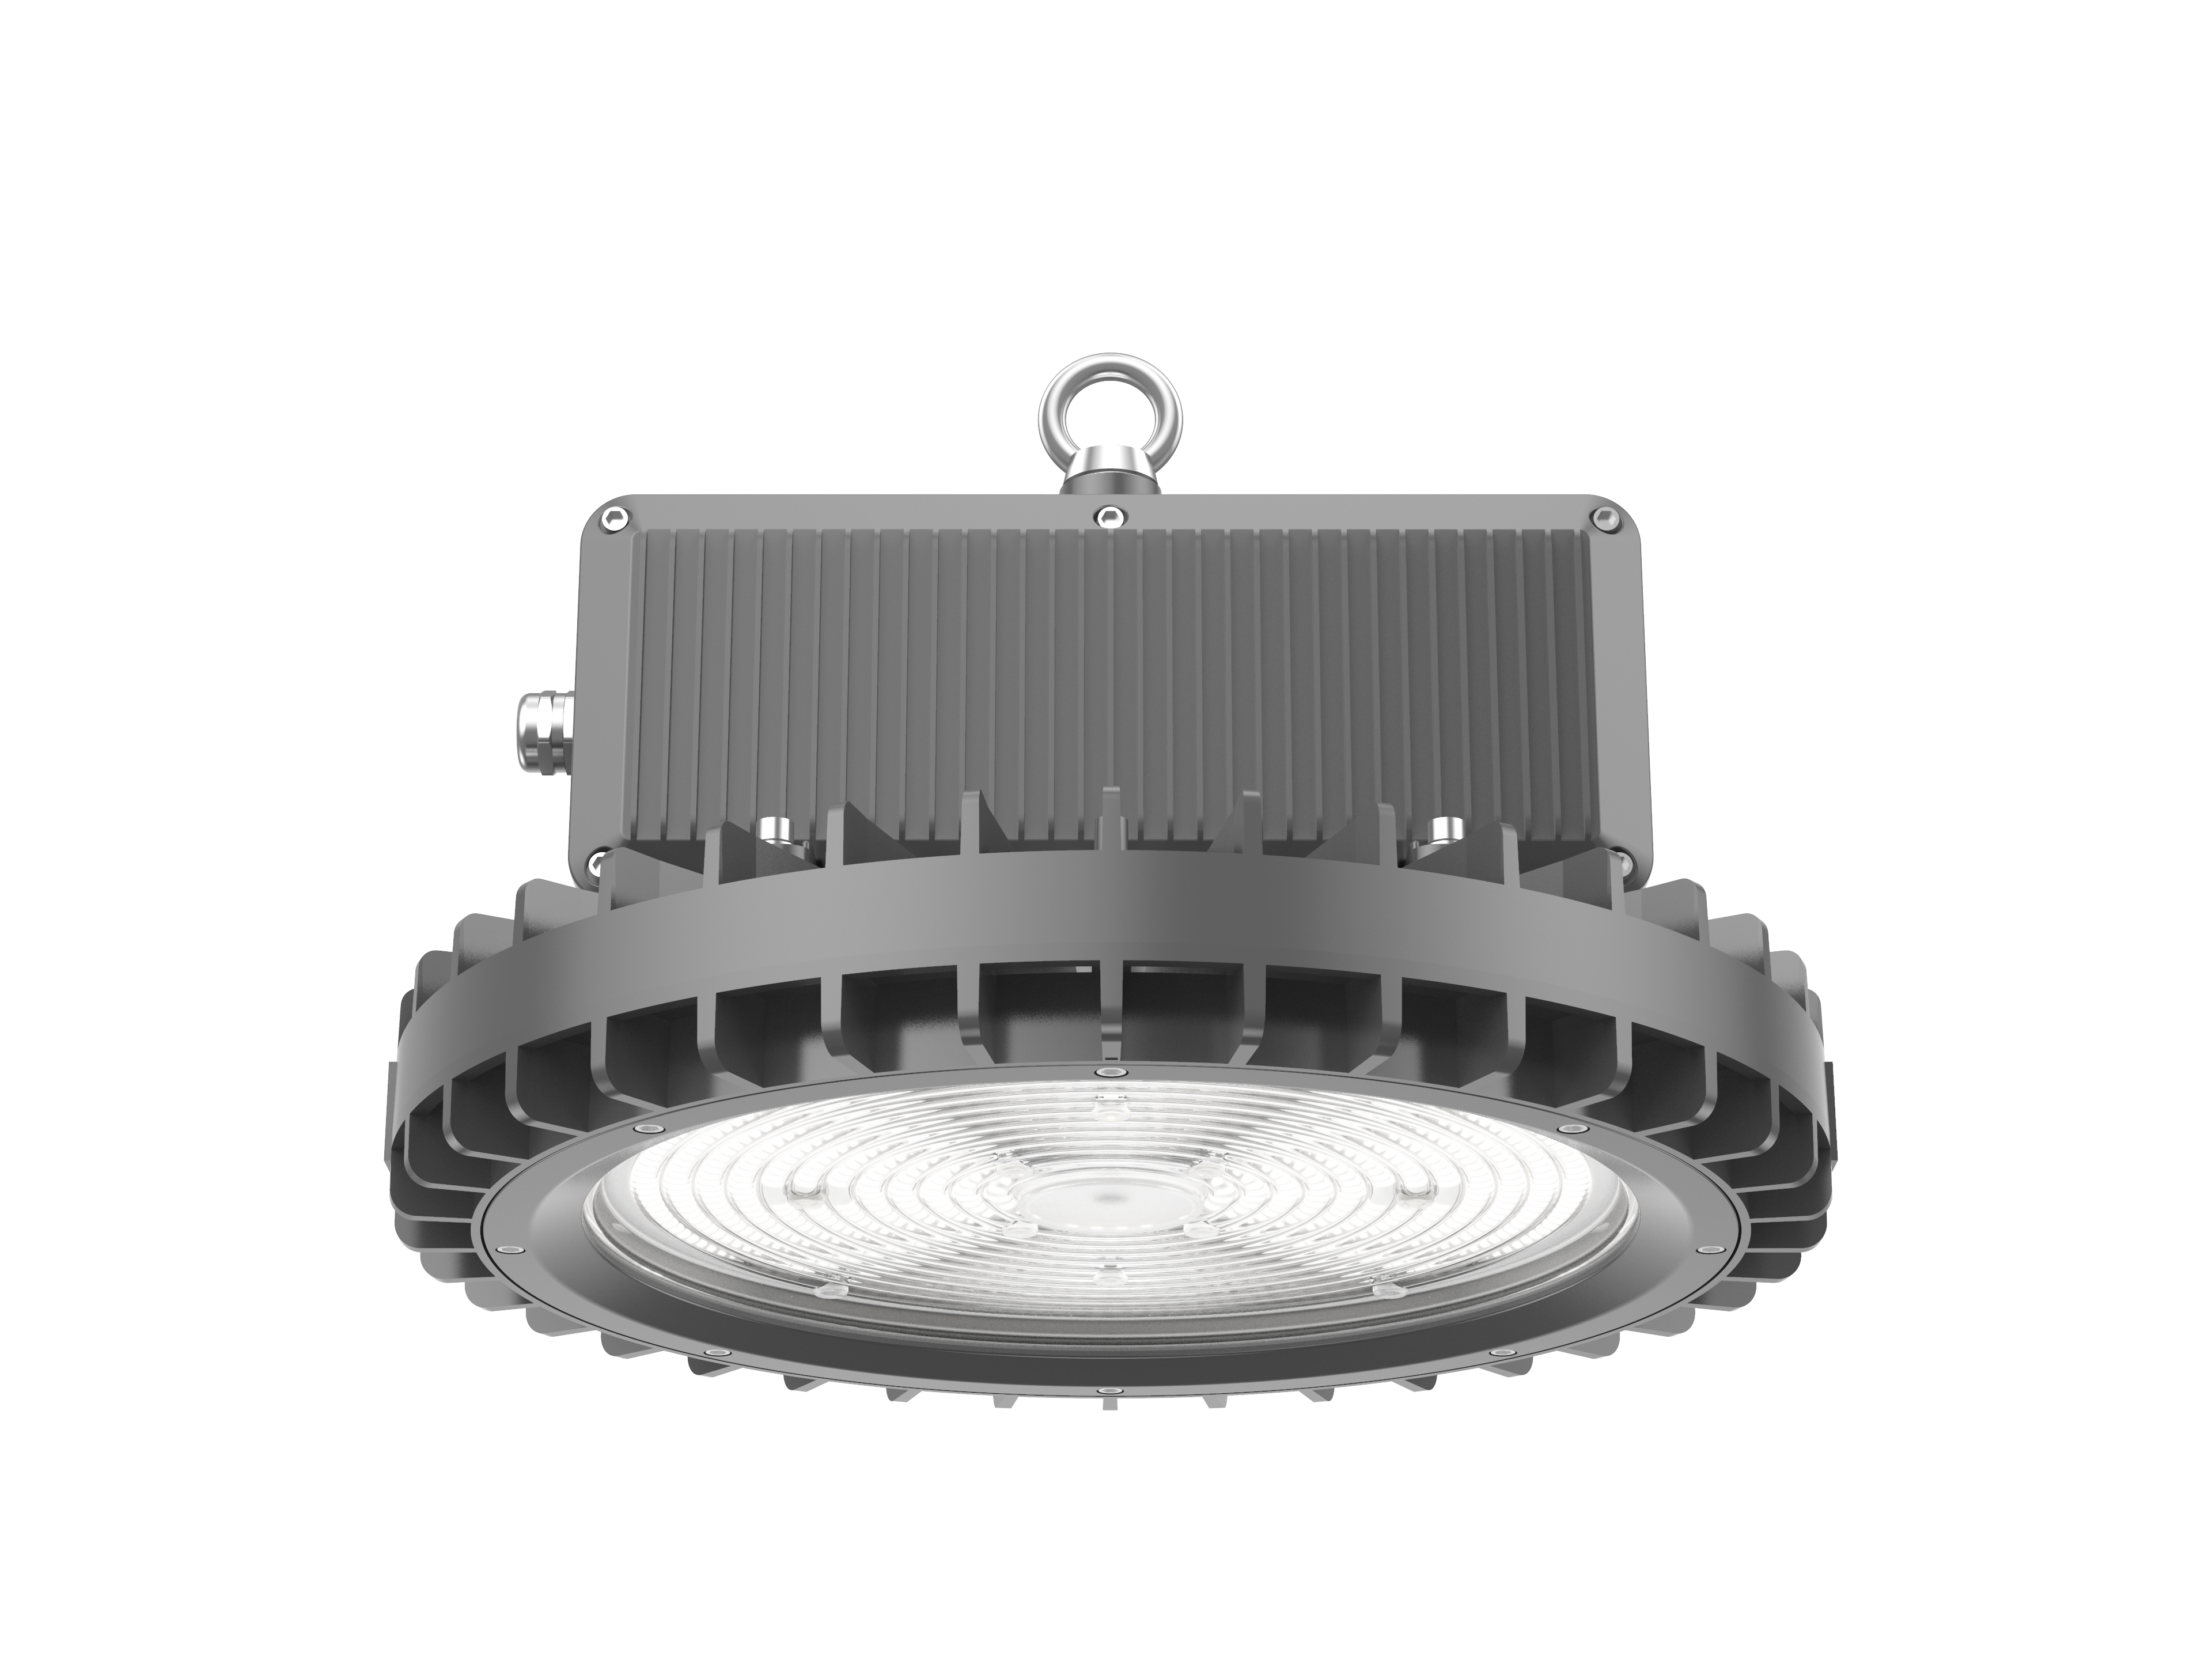
Designed to withstand temperatures
up to 65 degrees
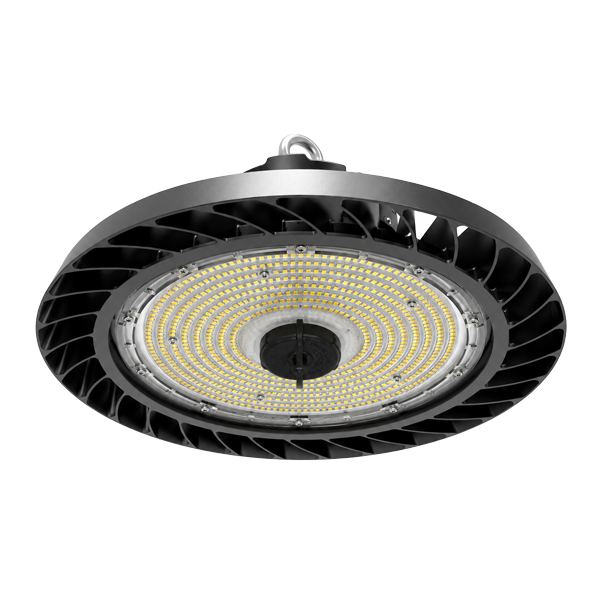
150lm/W
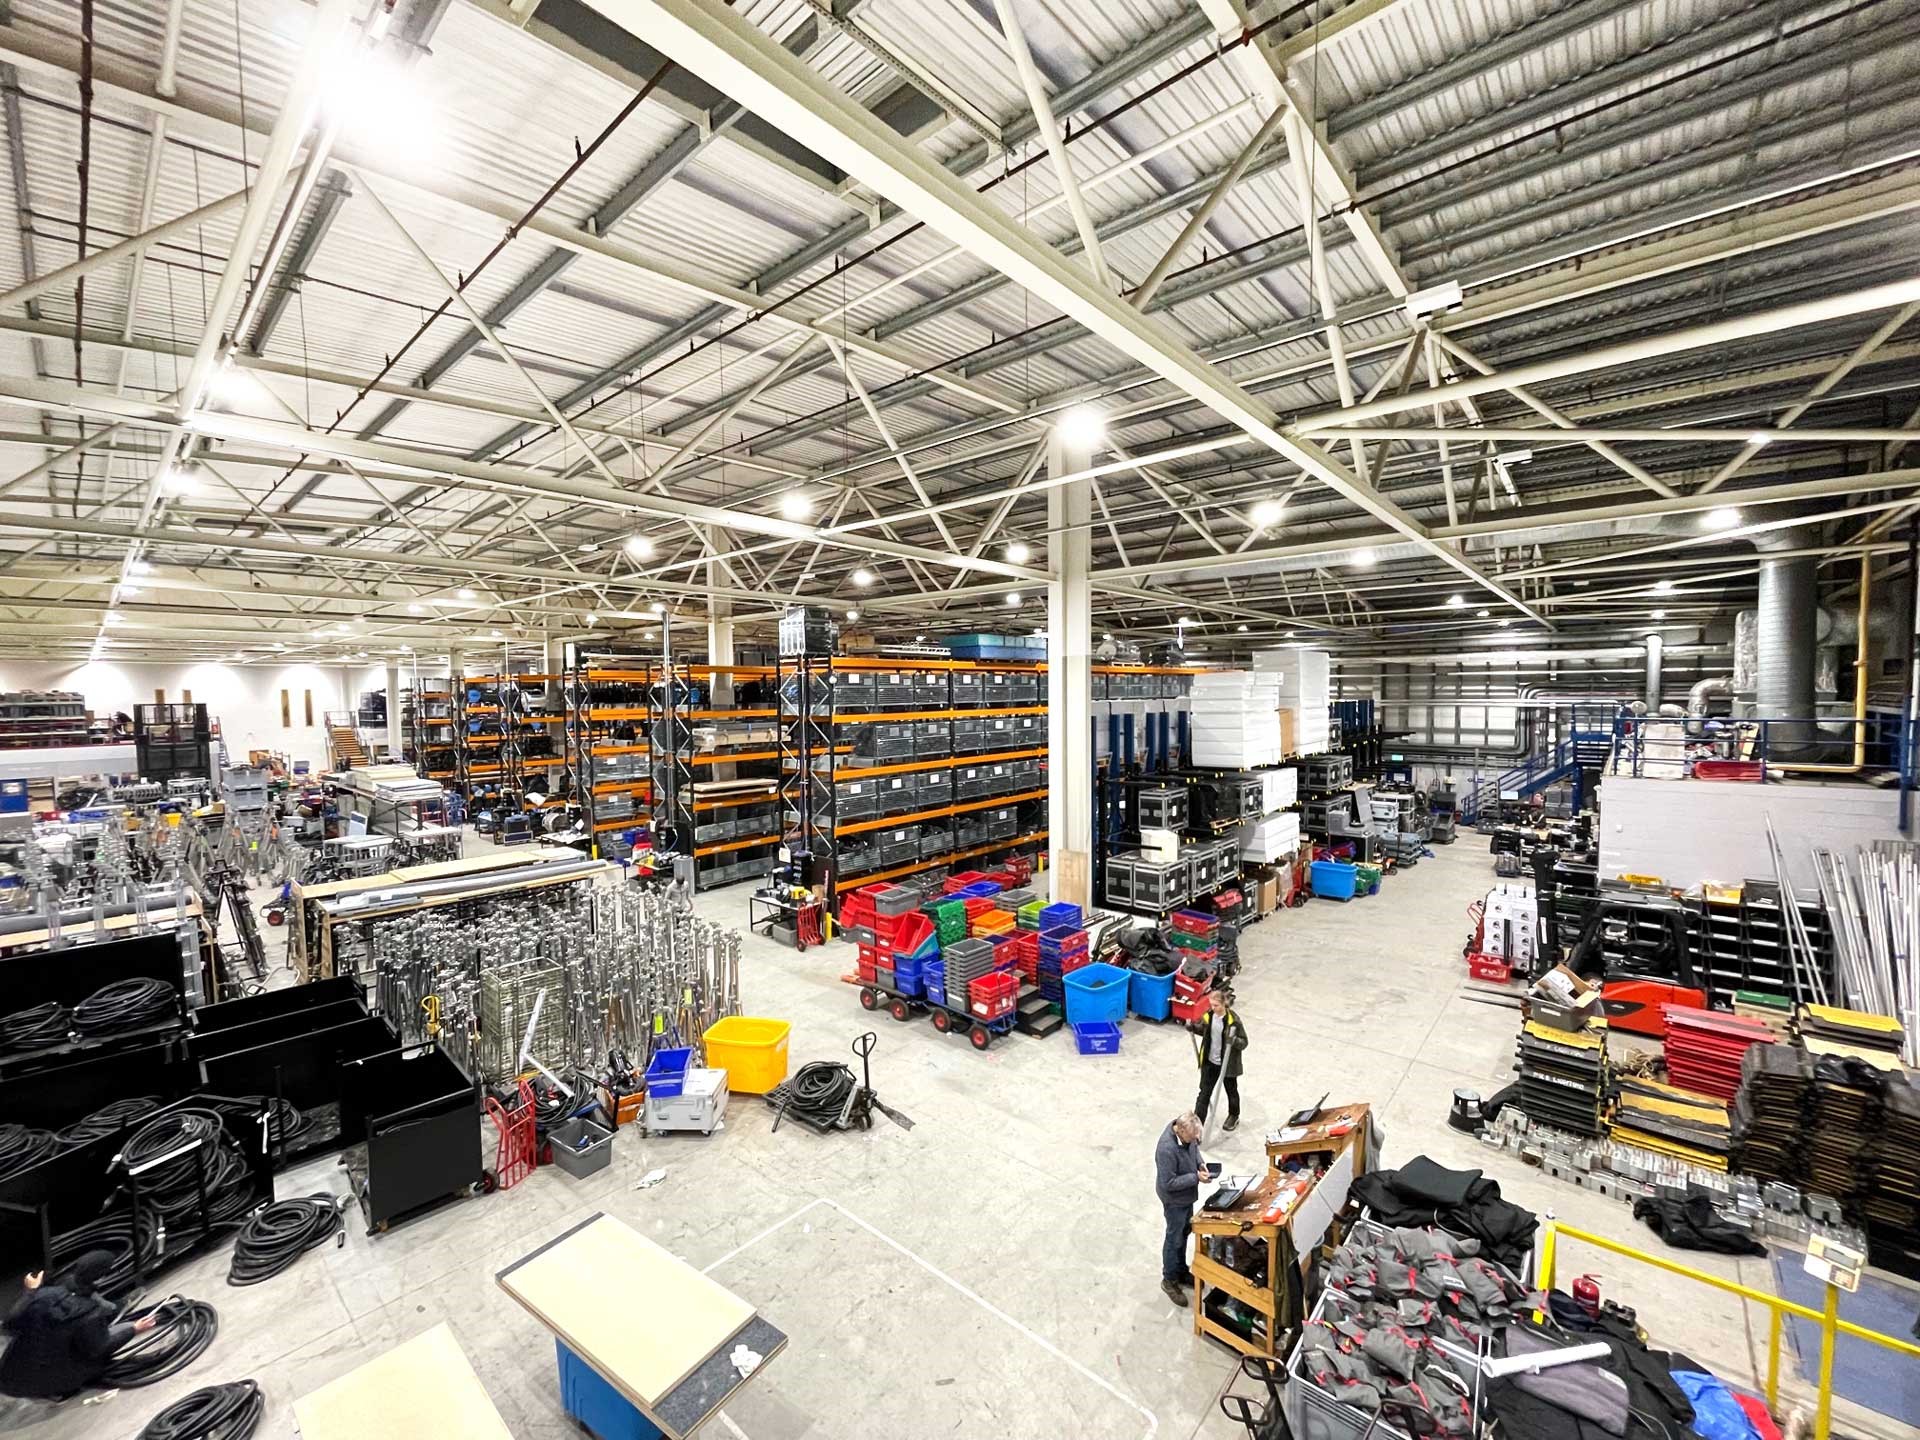
Ideal for heavy manufacturing
find out more...
Solutions from -35º to +55º
Robust, tamper-proof housing IP66
Ideal for industrial bakeries
find out more...

4 selectable output settings
Robust, tamper-proof housing
BESA compatible emergency options
find out more...
Rhea Utility Bulkhead
1600
3000/4000/6500K
8/12/16W
Rhea IP65 Commercial Bulkhead/Ceiling Utility Light

Rhea IP65 Commercial Bulkhead/Ceiling Utility Light
Rhea Utility Bulkhead
1600
Microwave ON/OFF
On-off sensor
3000/4000/6500K
8/12/16W
Rhea IP65 Commercial Bulkhead/Ceiling Utility Light with M/W ON/OFF Sensor
Rhea IP65 Commercial Bulkhead/Ceiling Utility Light with M/W ON/OFF Sensor
Rhea Utility Bulkhead
1600
Emergency
3000/4000/6500K
8/12/16W
Rhea IP65 Commercial Bulkhead/Ceiling Utility Light with Emergency
Rhea IP65 Commercial Bulkhead/Ceiling Utility Light with Emergency
Rhea Utility Bulkhead
1600
Emergency
Microwave ON/OFF
On-off sensor
3000/4000/6500K
8/12/16W
Rhea IP65 Commercial Bulkhead/Ceiling Utility Light with Emergency and M/W ON/OFF
Rhea IP65 Commercial Bulkhead/Ceiling Utility Light with Emergency and M/W ON/OFF
Rhea Utility Bulkhead
Rhea IP65 Commercial Bulkhead/Ceiling Utility Light Optional Bezzel

Rhea IP65 Commercial Bulkhead/Ceiling Utility Light Optional Bezzel
Rhea Utility Bulkhead
1500
3000/4000K
15W
Rhea IP65 Commercial Bulkhead/Ceiling Utility Light

Rhea IP65 Commercial Bulkhead/Ceiling Utility Light
Rhea Utility Bulkhead
1500
Emergency
3000/4000K
15W
Rhea IP65 Commercial Bulkhead/Ceiling Utility Light with Emergency Function
Rhea IP65 Commercial Bulkhead/Ceiling Utility Light with Emergency Function
Rhea Utility Wallpack
2200
3000/4000K
22W
Rhea IP65 Wallpack Utility Light

Rhea IP65 Wallpack Utility Light
Rhea Utility Wallpack
2000
4000K
22W
Rhea IP65 22W 1/2 Moon Circular Wall Pack Utility Light

Rhea IP65 22W 1/2 Moon Circular Wall Pack Utility Light
Rhea Utility Wallpack
800
4000K
10W
Rhea IP65 10W 1/2 Moon Circular Wall Pack Utility Light
Rhea IP65 10W 1/2 Moon Circular Wall Pack Utility Light
Rhea Utility Wallpack
3000/4000K
13/18/28W
Rhea Selectable Wall Pack Utility Light

Rhea Selectable Wall Pack Utility Light
Rhea Utility Wallpack
3920
Emergency
3000/4000K
13/18/28W
Rhea Selectable Wall Pack Utility Light Emergency
Rhea Selectable Wall Pack Utility Light Emergency
Rhea Utility Bollard
2000
3000/4000K
25W
Rhea Bollard Dome Head 2 Colour Selectable

Rhea Bollard Dome Head 2 Colour Selectable
Rhea Utility Bollard
2000
3000/4000K
25W
Rhea Bollard Flat Head 2 Colour Selectable

Rhea Bollard Flat Head 2 Colour Selectable
Rhea Utility Bollard
875
3000/4000K
25W
Rhea Bollard Louvre Head 2 Colour Selectable

Rhea Bollard Louvre Head 2 Colour Selectable
Hera Emergency Froglights
300
Emergency
6500K
2 x 1.25W
Hera IP20 Emergency Frog Lights - White


Hera IP20 Emergency Frog Lights - White
Hera Emergency Froglights
500
Emergency
6500K
2 x 2W
Hera IP65 Emergency Frog Lights - White

Hera IP65 Emergency Frog Lights - White
Hera Emergency Froglights
500
Emergency
6500K
2 x 2W
Hera IP65 Emergency Frog Lights - Black

Hera IP65 Emergency Frog Lights - Black
Hera Emergency Froglights
500
Emergency
6500K
2 x 1W
Hera IP65 Emergency Self-Test Frog Lights - White
Hera IP65 Emergency Self-Test Frog Lights - White
Hera Emergency Bulkheads
150
Emergency
6500K
3W
Hera Emergency Self-Test Bulkhead 3W

Hera Emergency Self-Test Bulkhead 3W
Hera Emergency Bulkheads
220
Emergency
5000K
2W
Hera Emergency DALI Self-Test Bulkhead 2W
Hera Emergency DALI Self-Test Bulkhead 2W
Hera Emergency Bulkheads
150
Emergency
6500K
3W
Hera Emergency Bulkhead 3W 110V

Hera Emergency Bulkhead 3W 110V
Hera Emergency Bulkheads
1500
Emergency
6500K
10W
Hera High Output Emergency Bulkhead 10W

Hera High Output Emergency Bulkhead 10W
Hera Emergency Bulkheads
1500
Emergency
6500K
10W
Hera High Output Emergency Self-Test Bulkhead 10W
Hera High Output Emergency Self-Test Bulkhead 10W
Hera Emergency Bulkheads
1200
Emergency
5000K
8W
Hera Emergency DALI Self-Test Bulkhead 8W
Hera Emergency DALI Self-Test Bulkhead 8W
Hera Emergency Bulkheads
Emergency
Hera Emergency Bulkhead Exit sign Diffuser

Hera Emergency Bulkhead Exit sign Diffuser
Hera Emergency Bulkheads
Emergency
Hera Emergency Bulkhead Recessed Kits
Hera Emergency Bulkhead Recessed Kits
Hera Emergency Froglights
1000
Emergency
6500K
2 x 4W
Hera IP65 Emergency High Output Frog Lights - White
Hera IP65 Emergency High Output Frog Lights - White
Hera Emergency Froglights
1000
Emergency
6500K
2 x 4W
Hera IP65 Emergency High Output Frog Lights - Black
Hera IP65 Emergency High Output Frog Lights - Black
Hera Emergency Froglights
1000
Emergency
6500K
2 x 4W
Hera IP65 Emergency Self-Test High Output Frog Lights - White
Hera IP65 Emergency Self-Test High Output Frog Lights - White
Hera Emergency Froglights
1000
Emergency
6500K
2 x 4.5W
Hera IP65 Emergency DALI Self-Test High Output Frog Lights - White
Hera IP65 Emergency DALI Self-Test High Output Frog Lights - White
Hera Emergency Spot Downlights
120
Emergency
6500K
1W
Hera Emergency 1W Spot Downlight

Hera Emergency 1W Spot Downlight
Hera Emergency Spot Downlights
120
Emergency
6500K
1W
Hera Emergency 1W Spot Downlight Black Housing

Hera Emergency 1W Spot Downlight Black Housing
Hera Emergency Spot Downlights
120
Emergency
6500K
1W
Hera Emergency 1W Self-Test Spot Downlight
Hera Emergency 1W Self-Test Spot Downlight
Hera Emergency Spot Downlights
280
Emergency
6500K
2W
Hera Emergency 2W Surface Mounted Square Spot Downlight - White

Hera Emergency 2W Surface Mounted Square Spot Downlight - White
Hera Emergency Spot Downlights
280
Emergency
6500K
2W
Hera Emergency 2W Surface Mounted Square Spot Downlight - Black

Hera Emergency 2W Surface Mounted Square Spot Downlight - Black
Hera Emergency Spot Downlights
280
Emergency
6500K
2W
Hera Emergency 2W Surface Mounted Self-Test Square Spot Downlight - White
Hera Emergency 2W Surface Mounted Self-Test Square Spot Downlight - White
Hera Emergency Spot Downlights
280
Emergency
6500K
2W
Hera Emergency 2W Surface Mounted Round Spot Downlight - White

Hera Emergency 2W Surface Mounted Round Spot Downlight - White
Hera Emergency Spot Downlights
280
Emergency
6500K
2W
Hera Emergency 2W Surface Mounted Round Spot Downlight - Black

Hera Emergency 2W Surface Mounted Round Spot Downlight - Black
Hera Emergency Spot Downlights
280
Emergency
6500K
2W
Hera Emergency 2W Surface Mounted Self-test Round Spot Downlight - White
Hera Emergency 2W Surface Mounted Self-test Round Spot Downlight - White
Hera Emergency Spot Downlights
240
Emergency
6500K
3W
Hera Emergency 3W Surface Mounted Round DALI Spot Downlight - White
Hera Emergency 3W Surface Mounted Round DALI Spot Downlight - White
Hera Emergency Spot Downlights
450
Emergency
6500K
6W
Hera Emergency 6W Surface Mounted Round DALI Spot Downlight - White
Hera Emergency 6W Surface Mounted Round DALI Spot Downlight - White
Hera Emergency Exit Signs
140
Emergency
6500K
3W
Hera Self Test / Manual Test Emergency Exit Box White - Maintained

Hera Self Test / Manual Test Emergency Exit Box White - Maintained
Hera Emergency Exit Signs
50
Emergency
6500K
1W
Hera Emergency DALI Exit Box White
Hera Emergency DALI Exit Box White
Hera Emergency Exit Signs
140
Emergency
6500K
3W
Hera Self Test / Manual Test Emergency Exit Box Black - Maintained

Hera Self Test / Manual Test Emergency Exit Box Black - Maintained
Hera Emergency Exit Signs
140
Emergency
6500K
3W
Hera Self-Test Emergency Exit Box White - Maintained
Hera Self-Test Emergency Exit Box White - Maintained
Hera Emergency Exit Signs
140
Emergency
6500K
3W
Hera Wall/Ceiling Mounted Emergency Exit Sign White - Maintained

Hera Wall/Ceiling Mounted Emergency Exit Sign White - Maintained
Hera Emergency Exit Signs
140
Emergency
6500K
3W
Hera Wall/Ceiling Mounted Self-Test Emergency Exit Sign White - Maintained
Hera Wall/Ceiling Mounted Self-Test Emergency Exit Sign White - Maintained
Hera Emergency Exit Signs
140
Emergency
6500K
3W
Hera Wall/Ceiling Mounted Emergency Exit Sign Black - Maintained

Hera Wall/Ceiling Mounted Emergency Exit Sign Black - Maintained


Hera Emergency Exit Signs
50
Emergency
6500K
1W
Hera Wall/Ceiling Mounted Emergency DALI Exit Sign White
Hera Wall/Ceiling Mounted Emergency DALI Exit Sign White
Hera Emergency Spot Downlights
220
Emergency
6500K
3W
Hera Emergency 3W DALI Self-Test Spot Downlight - White
Hera Emergency 3W DALI Self-Test Spot Downlight - White
Hera Emergency Exit Signs
Emergency
Hera Emergency DALI Exit Sign Recessed Kit

Hera Emergency DALI Exit Sign Recessed Kit
Hera Emergency Exit Signs
Emergency
Hera Emergency DALI Exit Sign Suspension Kit

Hera Emergency DALI Exit Sign Suspension Kit
Hera Emergency Exit Signs
Emergency
Hera Emergency DALI Exit Sign Track Mounted Kit
Hera Emergency DALI Exit Sign Track Mounted Kit
Barracuda IV Non-Corrosives
2500
No
Standard
4000/5000/6500K
10-17W
Barracuda IV 2ft 10-17W 3CCT Non-Corrosive


Barracuda IV 2ft 10-17W 3CCT Non-Corrosive
Barracuda IV Non-Corrosives
2500
Emergency
No
Standard
4000/5000/6500K
10-17W
Barracuda IV 2ft 10-17W 3CCT Non-Corrosive + 3hrs Em Self Test (Pre-Built)
Barracuda IV 2ft 10-17W 3CCT Non-Corrosive + 3hrs Em Self Test (Pre-Built)
Barracuda IV Non-Corrosives
2500
DALI
Standard
4000/5000/6500K
17W
Barracuda IV 2ft 10-17W 3CCT Non-Corrosive + DALI 2.0
Barracuda IV 2ft 10-17W 3CCT Non-Corrosive + DALI 2.0
Barracuda IV Non-Corrosives
5800
Emergency (Optional)
No
Standard
4000/5000/6500K
21-36W
Barracuda IV 4ft 21-36W 3CCT Non-Corrosive

Barracuda IV 4ft 21-36W 3CCT Non-Corrosive
Barracuda IV Non-Corrosives
5800
Emergency (Optional)
No
Standard
4000/5000/6500K
21-36W
Barracuda IV 4ft 21-36W 3CCT Non-Corrosive with Corridor Function
Barracuda IV 4ft 21-36W 3CCT Non-Corrosive with Corridor Function
Barracuda IV Non-Corrosives
5800
Emergency (Optional)
DALI
Standard
4000/5000/6500K
36W
Barracuda IV 4ft 36W 3CCT Non-Corrosive DALI 2.0
Barracuda IV 4ft 36W 3CCT Non-Corrosive DALI 2.0
Barracuda IV Non-Corrosives
4000
Emergency (Optional)
No
Standard
4000/5000/6500K
13-25W
Barracuda IV 5ft Low Output 13-25W 3CCT Non-Corrosive
Barracuda IV 5ft Low Output 13-25W 3CCT Non-Corrosive
Barracuda Xtreme Non-Corrosive Linear Fitting
2500
No
No
4000/5000/6500K
10-17W
Barracuda Xtreme 2ft 10-17W 3CCT Non-Corrosive
Barracuda Xtreme 2ft 10-17W 3CCT Non-Corrosive
Barracuda Xtreme Non-Corrosive Linear Fitting
5800
No
No
4000/5000/6500K
21-36W
Barracuda Xtreme 4ft 21-36W 3CCT Non-Corrosive
Barracuda Xtreme 4ft 21-36W 3CCT Non-Corrosive
Barracuda Xtreme Non-Corrosive Linear Fitting
8900
No
No
4000/5000/6500K
31-55W
Barracuda Xtreme 5ft High Output 31-55W 3CCT Non-Corrosive
Barracuda Xtreme 5ft High Output 31-55W 3CCT Non-Corrosive
Barracuda Xtreme Non-Corrosive Linear Fitting
10100
No
No
4000/5000/6500K
36-64W
Barracuda Xtreme 6ft 36-64W 3CCT Non-Corrosive
Barracuda Xtreme 6ft 36-64W 3CCT Non-Corrosive
Barracuda IV Non-Corrosives
8900
Emergency (Optional)
No
Standard
4000/5000/6500K
31-55W
Barracuda IV 5ft High Output 31-55W 3CCT Non-Corrosive
Barracuda IV 5ft High Output 31-55W 3CCT Non-Corrosive
Barracuda IV Non-Corrosives
8900
Emergency (Optional)
No
Standard
4000/5000/6500K
31-55W
Barracuda IV 5ft High Output 31-55W 3CCT Non-Corrosive with Corridor Function
Barracuda IV 5ft High Output 31-55W 3CCT Non-Corrosive with Corridor Function
Barracuda IV Non-Corrosives
8900
Emergency (Optional)
DALI
Standard
4000/5000/6500K
55W
Barracuda IV 5ft High Output 55W 3CCT Non-Corrosive + DALI 2.0
Barracuda IV 5ft High Output 55W 3CCT Non-Corrosive + DALI 2.0
Barracuda IV Non-Corrosives
10100
Emergency (Optional)
No
Standard
4000/5000/6500K
36-64W
Barracuda IV 6ft 36-64W CCT Non-Corrosive Non-Corrosive
Barracuda IV 6ft 36-64W CCT Non-Corrosive Non-Corrosive
Barracuda IV Non-Corrosives
10100
Emergency (Optional)
No
Standard
4000/5000/6500K
36-64W
Barracuda IV 6ft 36-64W CCT Non-Corrosive Non-Corrosive with Corridor Function
Barracuda IV 6ft 36-64W CCT Non-Corrosive Non-Corrosive with Corridor Function
Barracuda IV Non-Corrosives
10100
Emergency (Optional)
DALI
Standard
4000/5000/6500K
64W
Barracuda IV 6ft 64W Non-Corrosive 3CCT DALI 2.0
Barracuda IV 6ft 64W Non-Corrosive 3CCT DALI 2.0
Barracuda IV Non-Corrosives
450
Emergency
3W
Barracuda IV Self test Plug-in Emergency Pack
_1000px.png)
Barracuda IV Self test Plug-in Emergency Pack
Barracuda IV Non-Corrosives
Microwave ON/OFF
Barracuda IV Plug-in Microwave ON/OFF Sensor
Barracuda IV Plug-in Microwave ON/OFF Sensor
_r.jpeg)
_r.jpeg)
_r.jpeg)
_r.jpeg)
_r.jpeg)
Onyx IV Floods
60000
Standard
5000K
Featured
500W
Onyx 500W flood (5000K) with Stainless Steel bracket


Onyx 500W flood (5000K) with Stainless Steel bracket
Ava Asymmetric Flood Lights
Floods
7500
5000K
50W
AVA Asymmetric LED 50W Flood Light


AVA Asymmetric LED 50W Flood Light
AVA III Asymmetric Flood Lights
Floods
17000
No
5000K
100W
AVA III Asymmetric 100W Flood Light

AVA III Asymmetric 100W Flood Light
AVA III Asymmetric Flood Lights
Floods
25500
No
5000K
150W
AVA III Asymmetric 150W Flood Light

AVA III Asymmetric 150W Flood Light
AVA III Asymmetric Flood Lights
Floods
34000
No
5000K
200W
AVA III Asymmetric 200W Flood Light

AVA III Asymmetric 200W Flood Light
AVA III Asymmetric Flood Lights
Floods
40800
No
5000K
240W
AVA III Asymmetric 240W Flood Light
AVA III Asymmetric 240W Flood Light
AVA III Asymmetric Flood Lights
Floods
68000
No
5000K
400W
AVA III Asymmetric 400W Flood Light

AVA III Asymmetric 400W Flood Light
Gemini Linear High/Lowbay
High Bays
Daylight Harvesting (Optional)
Emergency (Optional)
DALI (Optional)
Standard
4000K
90-161W
Gemini Select 90/113/137/161W Wide Beam


Gemini Select 90/113/137/161W Wide Beam
Gemini Linear High/Lowbay
High Bays
Daylight Harvesting (Optional)
Emergency (Optional)
DALI (Optional)
Standard
4000K
90-161W
Gemini Select 90/113/137/161W Rack Beam
Gemini Select 90/113/137/161W Rack Beam
Gemini Linear High/Lowbay
High Bays
Daylight Harvesting (Optional)
27750
Emergency (Optional)
DALI (Optional)
Standard
4000K
185W
Gemini 185W Wide Beam
Gemini 185W Wide Beam
Gemini Linear High/Lowbay
High Bays
Daylight Harvesting (Optional)
27900
Emergency (Optional)
DALI (Optional)
Standard
4000K
185W
Gemini 185W Rack Lens
Gemini 185W Rack Lens
Tutor UGR<19 Select Linear Batten
6100
4000K
25-45W
Tutor Select Education LED 5ft Linear Batten UGR<19


Tutor Select Education LED 5ft Linear Batten UGR<19
Tutor UGR<19 Select Linear Batten
6100
Emergency
4000K
25-45W
Tutor Select Education LED 5ft Linear Batten UGR<19 Emergency

Tutor Select Education LED 5ft Linear Batten UGR<19 Emergency
Tutor UGR<19 Select Linear Batten
6100
Emergency
4000K
25-45W
Tutor Select Education LED 5ft Linear Batten UGR<19 Self Test Emergency
Tutor Select Education LED 5ft Linear Batten UGR<19 Self Test Emergency
Tutor UGR<19 Select Linear Batten
6100
Microwave ON/OFF
4000K
25-45W
Tutor Select Education LED 5ft Linear Batten UGR<19 Microwave On/Off Sensor
Tutor Select Education LED 5ft Linear Batten UGR<19 Microwave On/Off Sensor
Tutor UGR<19 Select Linear Batten
6100
Emergency
Microwave ON/OFF
4000K
25-45W
Tutor Select Education LED 5ft Linear Batten UGR<19 Emergency + Microwave Sensor On/Off
Tutor Select Education LED 5ft Linear Batten UGR<19 Emergency + Microwave Sensor On/Off
Tutor UGR<19 Select Linear Batten
6100
DALI
4000K
45W
Tutor Select Education LED 5ft Linear Batten UGR<19 + DALI / Switch DIM
Tutor Select Education LED 5ft Linear Batten UGR<19 + DALI / Switch DIM
Tutor UGR<19 Select Linear Batten
6100
DALI
4000K
45W
Tutor Select Education LED 5ft Linear Batten UGR<19 + DALI / Switch DIM + 3hrs Emergency
Tutor Select Education LED 5ft Linear Batten UGR<19 + DALI / Switch DIM + 3hrs Emergency
Tutor UGR<19 Select Linear Batten
6100
DALI
4000K
45W
Tutor Select Education LED 5ft Linear Batten UGR<19 + DALI / Switch DIM + Self Test Emergency
Tutor Select Education LED 5ft Linear Batten UGR<19 + DALI / Switch DIM + Self Test Emergency
Tutor UGR<19 Select Linear Batten
6100
DALI
4000K
45W
Tutor Select Education LED 5ft Linear Batten UGR<19 + DALI / Switch DIM + 3hrs DALI Self Test Emergency
Tutor Select Education LED 5ft Linear Batten UGR<19 + DALI / Switch DIM + 3hrs DALI Self Test Emergency
Solray III 3CCT Linear Batten
2400
3CCT (3/4/5700K)
10-18W
Solray Select III 2ft LED Batten 10-18W 3CCT


Solray Select III 2ft LED Batten 10-18W 3CCT
Solray III 3CCT Linear Batten
2400
3CCT (3/4/5700K)
10-18W
Solray Select III 2ft LED Batten 10-18W 3CCT + 3hrs Em Self Test (Pre-Built)
Solray Select III 2ft LED Batten 10-18W 3CCT + 3hrs Em Self Test (Pre-Built)
Solray III 3CCT Linear Batten
2400
3CCT (3/4/5700K)
10-18W
Solray Select III 2ft LED Batten 10-18W 3CCT with PIR Sensor
Solray Select III 2ft LED Batten 10-18W 3CCT with PIR Sensor
Solray III 3CCT Linear Batten
5200
3CCT (3/4/5700K)
20-34W
Solray Select III 4ft LED Batten 20-34W 3CCT
Solray Select III 4ft LED Batten 20-34W 3CCT
Solray III 3CCT Linear Batten
5200
3CCT (3/4/5700K)
20-34W
Solray Select III 4ft LED Batten 20-34W 3CCT with PIR Sensor
Solray Select III 4ft LED Batten 20-34W 3CCT with PIR Sensor
Solray III 3CCT Linear Batten
5200
DALI
3CCT (3/4/5700K)
34W
Solray Select III 4ft LED Batten 34W 3CCT DALI Dimmable
Solray Select III 4ft LED Batten 34W 3CCT DALI Dimmable
Solray III 3CCT Linear Batten
7200
3CCT (3/4/5700K)
28-48W
Solray Select III 5ft LED Batten 28-48W 3CCT
Solray Select III 5ft LED Batten 28-48W 3CCT
Solray III 3CCT Linear Batten
7200
3CCT (3/4/5700K)
28-48W
Solray Select III 5ft LED Batten 28-48W 3CCT with PIR Sensor
Solray Select III 5ft LED Batten 28-48W 3CCT with PIR Sensor
Solray III 3CCT Linear Batten
7200
DALI
3CCT (3/4/5700K)
48W
Solray Select III 5ft LED Batten 48W 3CCT DALI Dimmable
Solray Select III 5ft LED Batten 48W 3CCT DALI Dimmable
Solray III 3CCT Linear Batten
9400
3CCT (3/4/5700K)
30-53W
Solray Select III 5ft High Output LED Batten 30-53W 3CCT
Solray Select III 5ft High Output LED Batten 30-53W 3CCT
Solray III 3CCT Linear Batten
9400
3CCT (3/4/5700K)
30-53W
Solray Select III 5ft High Output LED Batten 30-53W 3CCT with PIR Sensor
Solray Select III 5ft High Output LED Batten 30-53W 3CCT with PIR Sensor
Solray III 3CCT Linear Batten
9400
DALI
3CCT (3/4/5700K)
53W
Solray Select III 5ft High Output LED Batten 53W 3CCT DALI Dimmable
Solray Select III 5ft High Output LED Batten 53W 3CCT DALI Dimmable
Solray III 3CCT Linear Batten
9700
3CCT (3/4/5700K)
35-62W
Solray Select III 6ft LED Batten 35-62W 3CCT
Solray Select III 6ft LED Batten 35-62W 3CCT
Solray III 3CCT Linear Batten
9700
3CCT (3/4/5700K)
35-62W
Solray Select III 6ft LED Batten 35-62W 3CCT with PIR Sensor
Solray Select III 6ft LED Batten 35-62W 3CCT with PIR Sensor
Solray III 3CCT Linear Batten
9700
DALI
3CCT (3/4/5700K)
62W
Solray Select III 6ft LED Batten 62W 3CCT DALI Dimmable
Solray Select III 6ft LED Batten 62W 3CCT DALI Dimmable
Solray III 3CCT Linear Batten
450
Emergency
3W
Solray Select III Self test Plug-in Emergency Pack
Solray Select III Self test Plug-in Emergency Pack
Stella Street Lights
6750
2700K
20-50W
Stella Selectable 20-50W Street Light 2700K T2 Lens


Stella Selectable 20-50W Street Light 2700K T2 Lens
Stella Street Lights
13500
2700K
100W
Stella 100W Street Light 2700K T2 Lens
Stella 100W Street Light 2700K T2 Lens
Stella Street Lights
7500
4000K
20-50W
Stella Selectable 20-50W Street Light 4000K T2 Lens
Stella Selectable 20-50W Street Light 4000K T2 Lens
Stella Street Lights
15000
4000K
100W
Stella 100W Street Light 4000K T2 Lens
Stella 100W Street Light 4000K T2 Lens
Horizon Panel
4000
4000K
20-40W
Horizon Select IP65 20-40W Tp(b) Panel 4000K


Horizon Select IP65 20-40W Tp(b) Panel 4000K
Horizon Panel
4000
4000K
20-40W
Horizon Select Decorative Troffer Ceiling Panel
Horizon Select Decorative Troffer Ceiling Panel
Horizon Panel
4100
3000/4000/5700K
30-40W
Horizon Select UGR Tp(a) Panel 3CCT + Power Selectable
Horizon Select UGR Tp(a) Panel 3CCT + Power Selectable
Horizon Panel
6000
Standard
4000K
Featured
60W
Horizon Select 60W Tp(b) 4000k 1200x600mm Panel
Horizon Select 60W Tp(b) 4000k 1200x600mm Panel
Horizon Panel
300
Emergency
2W
ELKEL3K - 3Hour Emergency Conversion Kit 2W
ELKEL3K - 3Hour Emergency Conversion Kit 2W
Ellipse Round Panel
1350
Emergency
Standard
4000K
15W
Ellipse 6" 15W Low Profile Recessed LED Downlight (cut out 175 Ø)


Ellipse 6" 15W Low Profile Recessed LED Downlight (cut out 175 Ø)
Ellipse Round Panel
1750
Emergency
Standard
4000K
18W
Ellipse 8" 18W Low Profile Recessed LED Downlight (cut out 210 Ø)
Ellipse 8" 18W Low Profile Recessed LED Downlight (cut out 210 Ø)
Ellipse Round Panel
1700
Emergency
Standard
3000/4000/5700K
18W
Ellipse 6" 18W 3CCT Recessed LED Downlight Tp(a) Diffuser (cut out 165-175 Ø)
Ellipse 6" 18W 3CCT Recessed LED Downlight Tp(a) Diffuser (cut out 165-175 Ø)
Ellipse Round Panel
2100
Emergency
Standard
3000/4000/5700K
20W
Ellipse 8" 20W 3CCT Recessed LED Downlight Tp(a) Diffuser (cut out 200-210 Ø)
Ellipse 8" 20W 3CCT Recessed LED Downlight Tp(a) Diffuser (cut out 200-210 Ø)
Sirius VI High Bay
High Bay/Low Bay - industrial
40000
4000K
100-200W
Sirius VI Pro High Bay (90°) 100-200W 200lm/W Selectable Outputs

Sirius VI Pro High Bay (90°) 100-200W 200lm/W Selectable Outputs
Sirius VI High Bay
High Bay/Low Bay - industrial
40000
Emergency
4000K
100-200W
Sirius VI Pro High Bay (90°) 100-200W 200lm/W Selectable Outputs with emergency
Sirius VI Pro High Bay (90°) 100-200W 200lm/W Selectable Outputs with emergency
Sirius VI High Bay
High Bay/Low Bay - industrial
32000
4000/5000/6500K
100-200W
Sirius Pro CCT 160lm/W Selectable Output & CCT LED High Bay
Sirius Pro CCT 160lm/W Selectable Output & CCT LED High Bay
Sirius VI High Bay
High Bay/Low Bay - industrial
32000
Emergency
4000/5000/6500K
100-200W
Sirius Pro CCT 160lm/W Selectable Output & CCT LED High Bay with emergency
Sirius Pro CCT 160lm/W Selectable Output & CCT LED High Bay with emergency
Sirius VI High Bay
High Bay/Low Bay - industrial
40000
4000
200W
Sirius DALI2 (200W) 200lm/W Dimmable Output LED High Bay
Sirius DALI2 (200W) 200lm/W Dimmable Output LED High Bay
Sirius VI High Bay
High Bay/Low Bay - industrial
40000
Emergency
4000
200W
Sirius DALI2 (200W) 200lm/W Dimmable Output LED High Bay with emergency
Sirius DALI2 (200W) 200lm/W Dimmable Output LED High Bay with emergency
Sirius VI High Bay
High Bay/Low Bay - industrial
36000
4000
120-200W
Sirius Lite High Bay (90°) 120W-200W 180lm/W Selectable Outputs
Sirius Lite High Bay (90°) 120W-200W 180lm/W Selectable Outputs
Sirius VI High Bay
High Bay/Low Bay - industrial
36000
Emergency
4000
120-200W
Sirius Lite High Bay (90°) 120W-200W 180lm/W Selectable Outputs with emergency
Sirius Lite High Bay (90°) 120W-200W 180lm/W Selectable Outputs with emergency
Sirius VI High Bay
High Bay/Low Bay - industrial
PIR Sensor for Sirius VI - 0-10V dimming, 12m mounting height, 8m detection radius, IP65, WHITE
PIR Sensor for Sirius VI - 0-10V dimming, 12m mounting height, 8m detection radius, IP65, WHITE
Sirius VI High Bay
High Bay/Low Bay - industrial
PIR Sensor for Sirius VI - 0-10V dimming, 12m mounting height, 8m detection radius, IP65,BLACK
PIR Sensor for Sirius VI - 0-10V dimming, 12m mounting height, 8m detection radius, IP65,BLACK
Sirius VI High Bay
High Bay/Low Bay - industrial
PIR Sensor for Sirius VI - 0-10V dimming, 15m mounting height, 8m detection radius, IP65,BLACK
PIR Sensor for Sirius VI - 0-10V dimming, 15m mounting height, 8m detection radius, IP65,BLACK
Sirius VI High Bay
High Bay/Low Bay - industrial
Remote Control for PIR sensors
Remote Control for PIR sensors
Sirius High Temperature High/Low Bay
38000
1-10
5000K
Featured
100-200W
Sirius Xtreme High Temperature Select Low Bay (90° Beam)
Sirius Xtreme High Temperature Select Low Bay (90° Beam)
Sirius High Temperature High/Low Bay
38000
1-10
5000K
Featured
100-200W
Sirius Xtreme High Temperature Select High Bay (60° Beam)
Sirius Xtreme High Temperature Select High Bay (60° Beam)
Artemis II Linear High Bay
High Bay/Low Bay - industrial
14625
5000K
75W
Artemis II 75W Artemis Luminaire with Rack lens 30 x 90° beam
_600px.jpeg)
Artemis II 75W Artemis Luminaire with Rack lens 30 x 90° beam
Artemis II Linear High Bay
High Bay/Low Bay - industrial
14625
Emergency
5000K
75W
Artemis II 75W Artemis Luminaire with Rack lens 30 x 90° beam with Emergency
Artemis II 75W Artemis Luminaire with Rack lens 30 x 90° beam with Emergency
Artemis II Linear High Bay
High Bay/Low Bay - industrial
14625
Emergency
5000K
75W
Artemis II 75W Artemis Luminaire with Rack lens 30 x 90° beam with Self-test Emergency
Artemis II 75W Artemis Luminaire with Rack lens 30 x 90° beam with Self-test Emergency
Artemis II Linear High Bay
High Bay/Low Bay - industrial
Daylight harvesting
14625
5000K
75W
Artemis II 75W Artemis Luminaire with Rack lens 30 x 90° beam with Smart Sensor PIR/Daylight Harvesting
Artemis II 75W Artemis Luminaire with Rack lens 30 x 90° beam with Smart Sensor PIR/Daylight Harvesting
Artemis II Linear High Bay
High Bay/Low Bay - industrial
Daylight harvesting
14625
Emergency
5000K
75W
Artemis II 75W Artemis Luminaire with Rack lens 30 x 90° beam with Emergency, Smart Sensor PIR/Daylight Harvesting
Artemis II 75W Artemis Luminaire with Rack lens 30 x 90° beam with Emergency, Smart Sensor PIR/Daylight Harvesting
Artemis II Linear High Bay
High Bay/Low Bay - industrial
Daylight harvesting
14625
Emergency
5000K
75W
Artemis II 75W Artemis Luminaire with Rack lens 30 x 90° beam with Self-test Emergency, Smart Sensor PIR/Daylight Harvesting
Artemis II 75W Artemis Luminaire with Rack lens 30 x 90° beam with Self-test Emergency, Smart Sensor PIR/Daylight Harvesting
Artemis II Linear High Bay
High Bay/Low Bay - industrial
14625
DALI
5000K
75W
Artemis II 75W Artemis Luminaire with Rack lens 30 x 90° beam with DALI-2 Solution
Artemis II 75W Artemis Luminaire with Rack lens 30 x 90° beam with DALI-2 Solution
Artemis II Linear High Bay
High Bay/Low Bay - industrial
14625
Emergency
DALI
5000K
75W
Artemis II 75W Artemis Luminaire with Rack lens 30 x 90° beam with DALI-2 Solution and Self-test Emergency
Artemis II 75W Artemis Luminaire with Rack lens 30 x 90° beam with DALI-2 Solution and Self-test Emergency
Artemis II Linear High Bay
High Bay/Low Bay - industrial
14625
5000K
75W
Artemis II 75W Artemis Luminaire with Wide lens 60 x 100° beam
Artemis II 75W Artemis Luminaire with Wide lens 60 x 100° beam
Artemis II Linear High Bay
High Bay/Low Bay - industrial
14625
Emergency
5000K
75W
Artemis II 75W Artemis Luminaire with Wide lens 60 x 100° beam with Emergency
Artemis II 75W Artemis Luminaire with Wide lens 60 x 100° beam with Emergency
Artemis II Linear High Bay
High Bay/Low Bay - industrial
14625
Emergency
5000K
75W
Artemis II 75W Artemis Luminaire with Wide lens 60 x 100° beam with Self-test Emergency
Artemis II 75W Artemis Luminaire with Wide lens 60 x 100° beam with Self-test Emergency
Artemis II Linear High Bay
High Bay/Low Bay - industrial
Daylight harvesting
14625
5000K
75W
Artemis II 75W Artemis Luminaire with Wide lens 60 x 100° beam with Smart Sensor PIR/Daylight Harvesting
Artemis II 75W Artemis Luminaire with Wide lens 60 x 100° beam with Smart Sensor PIR/Daylight Harvesting
Artemis II Linear High Bay
High Bay/Low Bay - industrial
Daylight harvesting
14625
Emergency
5000K
75W
Artemis II 75W Artemis Luminaire with Wide lens 60 x 100° beam with Emergency, Smart Sensor PIR/Daylight Harvesting
Artemis II 75W Artemis Luminaire with Wide lens 60 x 100° beam with Emergency, Smart Sensor PIR/Daylight Harvesting
Artemis II Linear High Bay
High Bay/Low Bay - industrial
Daylight harvesting
14625
Emergency
5000K
75W
Artemis II 75W Artemis Luminaire with Wide lens 60 x 100° beam with Self-test Emergency, Smart Sensor PIR/Daylight Harvesting
Artemis II 75W Artemis Luminaire with Wide lens 60 x 100° beam with Self-test Emergency, Smart Sensor PIR/Daylight Harvesting
Artemis II Linear High Bay
High Bay/Low Bay - industrial
14625
DALI
5000K
75W
Artemis II 75W Artemis Luminaire with Wide lens 60 x 100° beam with DALI-2 Solution
Artemis II 75W Artemis Luminaire with Wide lens 60 x 100° beam with DALI-2 Solution
Artemis II Linear High Bay
High Bay/Low Bay - industrial
14625
Emergency
DALI
5000K
75W
Artemis II 75W Artemis Luminaire with Wide lens 60 x 100° beam with DALI-2 Solution and Self-test Emergency
Artemis II 75W Artemis Luminaire with Wide lens 60 x 100° beam with DALI-2 Solution and Self-test Emergency
Artemis II Linear High Bay
High Bay/Low Bay - industrial
23160
5000K
120W
Artemis II 120W Artemis Luminaire with Rack lens 30 x 90° beam
Artemis II 120W Artemis Luminaire with Rack lens 30 x 90° beam
Artemis II Linear High Bay
High Bay/Low Bay - industrial
23160
Emergency
5000K
120W
Artemis II 120W Artemis Luminaire with Rack lens 30 x 90° beam with Emergency
Artemis II 120W Artemis Luminaire with Rack lens 30 x 90° beam with Emergency
Artemis II Linear High Bay
High Bay/Low Bay - industrial
23160
Emergency
5000K
120W
Artemis II 120W Artemis Luminaire with Rack lens 30 x 90° beam with Self-test Emergency
Artemis II 120W Artemis Luminaire with Rack lens 30 x 90° beam with Self-test Emergency
Artemis II Linear High Bay
High Bay/Low Bay - industrial
Daylight harvesting
23160
5000K
120W
Artemis II 120W Artemis Luminaire with Rack lens 30 x 90° beam with Smart Sensor PIR/Daylight Harvesting
Artemis II 120W Artemis Luminaire with Rack lens 30 x 90° beam with Smart Sensor PIR/Daylight Harvesting
Artemis II Linear High Bay
High Bay/Low Bay - industrial
Daylight harvesting
23160
Emergency
5000K
120W
Artemis II 120W Artemis Luminaire with Rack lens 30 x 90° beam with Emergency, Smart Sensor PIR/Daylight Harvesting
Artemis II 120W Artemis Luminaire with Rack lens 30 x 90° beam with Emergency, Smart Sensor PIR/Daylight Harvesting
Artemis II Linear High Bay
High Bay/Low Bay - industrial
Daylight harvesting
23160
Emergency
5000K
120W
Artemis II 120W Artemis Luminaire with Rack lens 30 x 90° beam with Self-test Emergency, Smart Sensor PIR/Daylight Harvesting
Artemis II 120W Artemis Luminaire with Rack lens 30 x 90° beam with Self-test Emergency, Smart Sensor PIR/Daylight Harvesting
Artemis II Linear High Bay
High Bay/Low Bay - industrial
23160
DALI
5000K
120W
Artemis II 120W Artemis Luminaire with Rack lens 30 x 90° beam with DALI-2 Solution
Artemis II 120W Artemis Luminaire with Rack lens 30 x 90° beam with DALI-2 Solution
Artemis II Linear High Bay
High Bay/Low Bay - industrial
23160
Emergency
DALI
5000K
120W
Artemis II 120W Artemis Luminaire with Rack lens 30 x 90° beam with DALI-2 Solution and Self-test Emergency
Artemis II 120W Artemis Luminaire with Rack lens 30 x 90° beam with DALI-2 Solution and Self-test Emergency
Artemis II Linear High Bay
High Bay/Low Bay - industrial
23160
5000K
120W
Artemis II 120W Artemis Luminaire with Wide lens 60 x 100° beam
Artemis II 120W Artemis Luminaire with Wide lens 60 x 100° beam
Artemis II Linear High Bay
High Bay/Low Bay - industrial
23160
Emergency
5000K
120W
Artemis II 120W Artemis Luminaire with Wide lens 60 x 100° beam with Emergency
Artemis II 120W Artemis Luminaire with Wide lens 60 x 100° beam with Emergency
Artemis II Linear High Bay
High Bay/Low Bay - industrial
23160
Emergency
5000K
120W
Artemis II 120W Artemis Luminaire with Wide lens 60 x 100° beam with Self-test Emergency
Artemis II 120W Artemis Luminaire with Wide lens 60 x 100° beam with Self-test Emergency
Artemis II Linear High Bay
High Bay/Low Bay - industrial
Daylight harvesting
23160
5000K
120W
Artemis II 120W Artemis Luminaire with Wide lens 60 x 100° beam with Smart Sensor PIR/Daylight Harvesting
Artemis II 120W Artemis Luminaire with Wide lens 60 x 100° beam with Smart Sensor PIR/Daylight Harvesting
Artemis II Linear High Bay
High Bay/Low Bay - industrial
Daylight harvesting
23160
Emergency
5000K
120W
Artemis II 120W Artemis Luminaire with Wide lens 60 x 100° beam with Emergency, Smart Sensor PIR/Daylight Harvesting
Artemis II 120W Artemis Luminaire with Wide lens 60 x 100° beam with Emergency, Smart Sensor PIR/Daylight Harvesting
Artemis II Linear High Bay
High Bay/Low Bay - industrial
Daylight harvesting
23160
Emergency
5000K
120W
Artemis II 120W Artemis Luminaire with Wide lens 60 x 100° beam with Self-test Emergency, Smart Sensor PIR/Daylight Harvesting
Artemis II 120W Artemis Luminaire with Wide lens 60 x 100° beam with Self-test Emergency, Smart Sensor PIR/Daylight Harvesting
Artemis II Linear High Bay
High Bay/Low Bay - industrial
23160
DALI
5000K
120W
Artemis II 120W Artemis Luminaire with Wide lens 60 x 100° beam with DALI-2 Solution
Artemis II 120W Artemis Luminaire with Wide lens 60 x 100° beam with DALI-2 Solution
Artemis II Linear High Bay
High Bay/Low Bay - industrial
23160
Emergency
DALI
5000K
120W
Artemis II 120W Artemis Luminaire with Wide lens 60 x 100° beam with DALI-2 Solution and Self-test Emergency
Artemis II 120W Artemis Luminaire with Wide lens 60 x 100° beam with DALI-2 Solution and Self-test Emergency
Artemis II Linear High Bay
High Bay/Low Bay - industrial
28500
5000K
150W
Artemis II 150W Artemis Luminaire with Rack lens 30 x 90° beam
Artemis II 150W Artemis Luminaire with Rack lens 30 x 90° beam
Artemis II Linear High Bay
High Bay/Low Bay - industrial
28500
Emergency
5000K
150W
Artemis II 150W Artemis Luminaire with Rack lens 30 x 90° beam with Emergency
Artemis II 150W Artemis Luminaire with Rack lens 30 x 90° beam with Emergency
Artemis II Linear High Bay
High Bay/Low Bay - industrial
28500
Emergency
5000K
150W
Artemis II 150W Artemis Luminaire with Rack lens 30 x 90° beam with Self-test Emergency
Artemis II 150W Artemis Luminaire with Rack lens 30 x 90° beam with Self-test Emergency
Artemis II Linear High Bay
High Bay/Low Bay - industrial
Daylight harvesting
28500
5000K
150W
Artemis II 150W Artemis Luminaire with Rack lens 30 x 90° beam with Smart Sensor PIR/Daylight Harvesting
Artemis II 150W Artemis Luminaire with Rack lens 30 x 90° beam with Smart Sensor PIR/Daylight Harvesting
Artemis II Linear High Bay
High Bay/Low Bay - industrial
Daylight harvesting
28500
Emergency
5000K
150W
Artemis II 150W Artemis Luminaire with Rack lens 30 x 90° beam with Emergency, Smart Sensor PIR/Daylight Harvesting
Artemis II 150W Artemis Luminaire with Rack lens 30 x 90° beam with Emergency, Smart Sensor PIR/Daylight Harvesting
Artemis II Linear High Bay
High Bay/Low Bay - industrial
Daylight harvesting
28500
Emergency
5000K
150W
Artemis II 150W Artemis Luminaire with Rack lens 30 x 90° beam with Self-test Emergency, Smart Sensor PIR/Daylight Harvesting
Artemis II 150W Artemis Luminaire with Rack lens 30 x 90° beam with Self-test Emergency, Smart Sensor PIR/Daylight Harvesting
Artemis II Linear High Bay
High Bay/Low Bay - industrial
28500
Emergency
DALI
5000K
150W
Artemis II 150W Artemis Luminaire with Rack lens 30 x 90° beam with DALI-2 Solution and Self-test Emergency
Artemis II 150W Artemis Luminaire with Rack lens 30 x 90° beam with DALI-2 Solution and Self-test Emergency
Artemis II Linear High Bay
High Bay/Low Bay - industrial
28500
DALI
5000K
150W
Artemis II 150W Artemis Luminaire with Rack lens 30 x 90° beam with DALI-2 Solution
Artemis II 150W Artemis Luminaire with Rack lens 30 x 90° beam with DALI-2 Solution
Artemis II Linear High Bay
High Bay/Low Bay - industrial
28500
5000K
150W
Artemis II 150W Artemis Luminaire with Wide lens 60 x 100° beam
Artemis II 150W Artemis Luminaire with Wide lens 60 x 100° beam
Artemis II Linear High Bay
High Bay/Low Bay - industrial
28500
Emergency
5000K
150W
Artemis II 150W Artemis Luminaire with Wide lens 60 x 100° beam with Emergency
Artemis II 150W Artemis Luminaire with Wide lens 60 x 100° beam with Emergency
Artemis II Linear High Bay
High Bay/Low Bay - industrial
28500
Emergency
5000K
150W
Artemis II 150W Artemis Luminaire with Wide lens 60 x 100° beam with Self-test Emergency
Artemis II 150W Artemis Luminaire with Wide lens 60 x 100° beam with Self-test Emergency
Artemis II Linear High Bay
High Bay/Low Bay - industrial
Daylight harvesting
28500
5000K
150W
Artemis II 150W Artemis Luminaire with Wide lens 60 x 100° beam with Smart Sensor PIR/Daylight Harvesting
Artemis II 150W Artemis Luminaire with Wide lens 60 x 100° beam with Smart Sensor PIR/Daylight Harvesting
Artemis II Linear High Bay
High Bay/Low Bay - industrial
Daylight harvesting
28500
Emergency
5000K
150W
Artemis II 150W Artemis Luminaire with Wide lens 60 x 100° beam with Emergency, Smart Sensor PIR/Daylight Harvesting
Artemis II 150W Artemis Luminaire with Wide lens 60 x 100° beam with Emergency, Smart Sensor PIR/Daylight Harvesting
Artemis II Linear High Bay
High Bay/Low Bay - industrial
Daylight harvesting
28500
Emergency
5000K
150W
Artemis II 150W Artemis Luminaire with Wide lens 60 x 100° beam with Self-test Emergency, Smart Sensor PIR/Daylight Harvesting
Artemis II 150W Artemis Luminaire with Wide lens 60 x 100° beam with Self-test Emergency, Smart Sensor PIR/Daylight Harvesting
Artemis II Linear High Bay
High Bay/Low Bay - industrial
28500
DALI
5000K
150W
Artemis II 150W Artemis Luminaire with Wide lens 60 x 100° beam with DALI-2 Solution
Artemis II 150W Artemis Luminaire with Wide lens 60 x 100° beam with DALI-2 Solution
Artemis II Linear High Bay
High Bay/Low Bay - industrial
28500
Emergency
DALI
5000K
150W
Artemis II 150W Artemis Luminaire with Wide lens 60 x 100° beam with DALI-2 Solution and Self-test Emergency
Artemis II 150W Artemis Luminaire with Wide lens 60 x 100° beam with DALI-2 Solution and Self-test Emergency
Artemis II Linear High Bay
High Bay/Low Bay - industrial
Artemis II Microwave Dimmable Sensor
Artemis II Microwave Dimmable Sensor
Thank you! Your submission has been received!